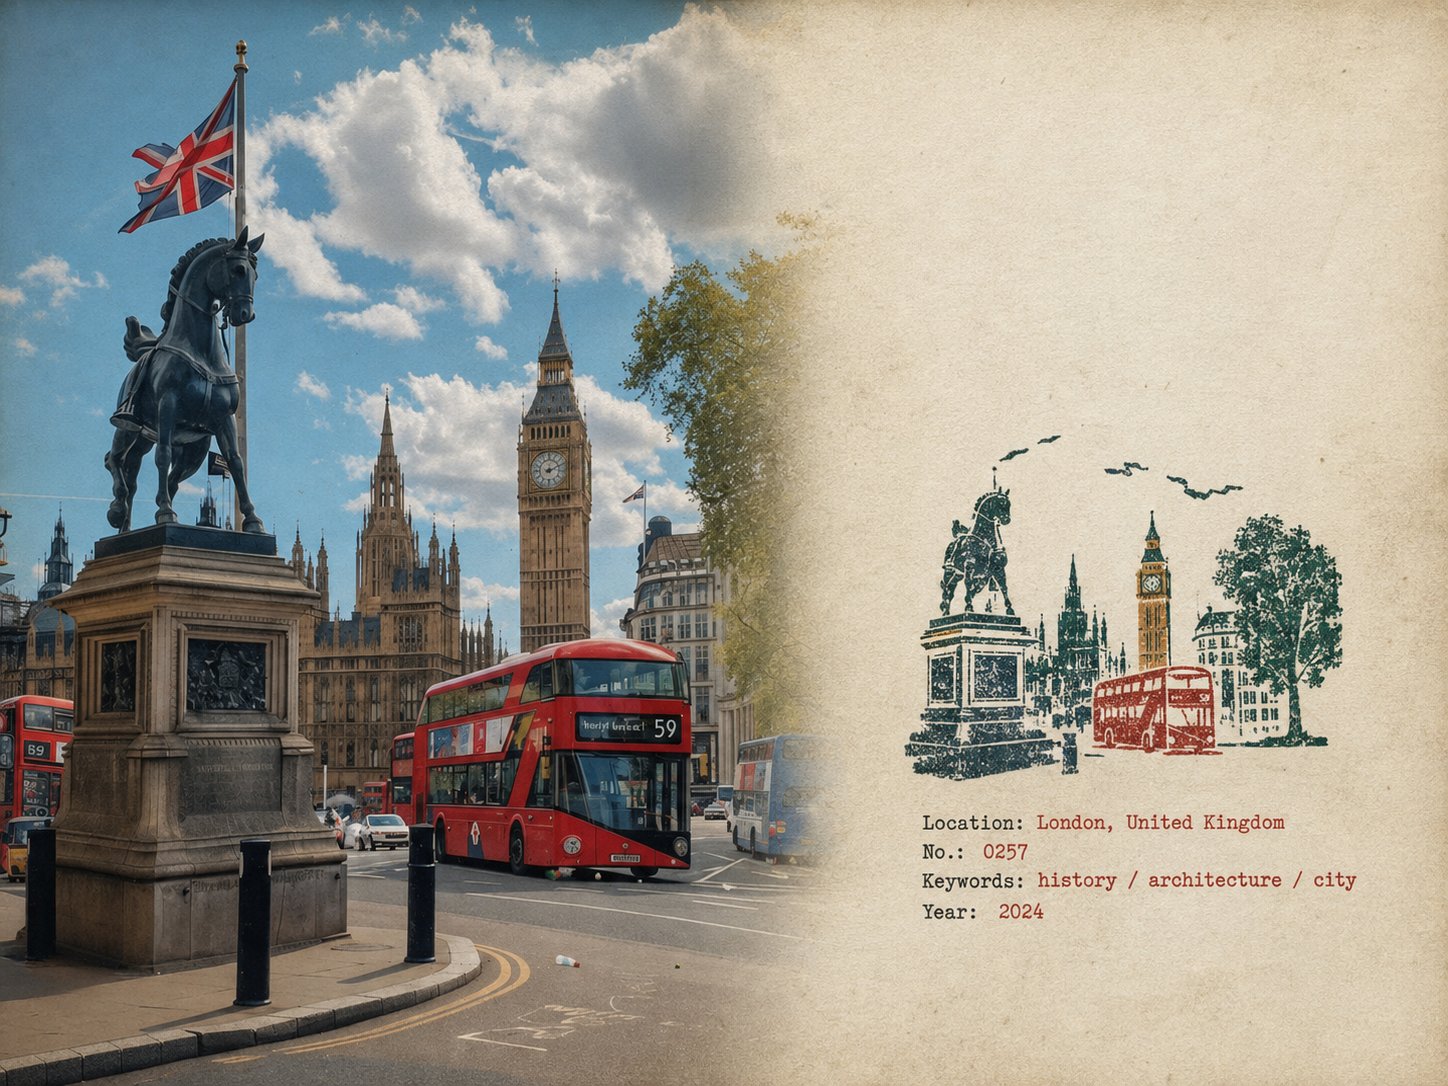
橡皮图章旅行现场笔记海报 — 自然写实版 为我上传的每张照片创建一个单独的 “橡皮图章旅行现场笔记海报”。单独输出每张照片。切勿创建拼贴画或组合多张照片。 使用 4:3 风景构图,在左侧的原始照片和右侧的旧纸田野笔记区域之间实现自然的视觉过渡。不要添加明显的分割线。 左侧 — 原始照片 左侧应大约占据框架的 58%。 保持上传的照片视觉上真实且可识别。保留原始主题、视角、地形、建筑、植物、人物、空间关系、自然光、阴影、纹理和整体氛围。 请勿重新设计或重新解释照片。 仅应用非常微妙的编辑照片处理:温和的色调平衡、克制的色彩分级、稍微柔化的高光以及极其精细的自然胶片颗粒。它应该看起来仍然像在现场拍摄的真实照片,而不是 AI- 生成的图像。 如果需要适合 4:3 布局,则允许自然裁剪,但不要拉伸、扭曲、移动、替换或重绘主要主题。 避免过度锐化、HDR 效果、人工清晰度、电影色彩分级或过于完美的细节。 右侧 — 旧纸现场笔记 右侧应大约占据框架的 42%。 使用温暖的灰白色、稍微老化的纸张 具有可信的物理纹理。包括非常微妙的纸纤维、细颗粒、微弱的处理痕迹和哑光表面。 保持大面积区域完全不打印。 这张纸应该感觉像是建筑师旅行笔记本或实地日记中的真实纸张,而不是设计的海报背景。 避免过于强烈的污渍、装饰纹理、复古滤镜或人为做旧纹理。 小型橡皮图章 研究上传的照片并仅识别少数可以立即识别该位置的视觉特征。 将它们简化为紧凑的、不完美的多色橡皮图章印象。 请勿逐个元素地复制照片。 积极简化并仅保留最有意义的视觉关系: - 独特的建筑和轮廓 - 重要的屋顶、塔楼、圆顶、拱门或结构形状 - 山地或地形轮廓 - 海岸线或道路方向 - 一些可识别的树木或植被形式 - 简化的聚落层次 - 视觉相关时的一两个重要前景形状 移除人群、汽车、密集的窗户、重复的建筑物、微小的植被、装饰物和无关紧要的背景细节。 结果应该看起来像旅行者实际上可以刻在一个小橡皮图章上的东西,而不是整个照片的微型插图。 将印章放在印章的中下部分 右侧纸张区域,大约占据右侧部分高度的 30 – 38%。 在其周围保留大量空白纸。 不要将其放大为大插图。 图章色彩与印刷特征 从原始照片中自然提取大约 2 – 4 柔和的专色。 可能的颜色包括: - 炭黑 - 深绿色 - 砖红色或柔和红色 - 赭色 - 石板蓝 - 灰褐色或土棕色 如果照片暗示了不同的克制调色板,请不要强行使用这些颜色。 每种颜色应显示为单独的物理墨水层。 让印刷品感觉真正手工制作: - 压力略有不均匀 - 墨水中的微小间隙 - 印墨干涩的区域 - 露出纸张底色 - 粗糙的雕刻边缘 - 不规则线粗 - 小轮廓断裂 - 颗粒状墨水纹理 - 微弱重影 - 轻微的自然色层重合失调 - 细微的边缘变化 瑕疵应该小而可信,就像印章是用手压在纸上一样。 避免完美对齐的数字图层、平滑的矢量边缘、干净的渐变或人为夸大的破损做旧。 印章应该看起来是实体打印的,而不是数字插图的。 现场笔记字体排版 仅根据照片中的实际位置和图像生成少量文本: 地点 — 英文名称 编号 — 编号 三个短英文关键词 公历年 将文本放置在图章下方或旁边的可用空白区域内。 使用小型、低调的打字机或档案田野笔记风格。 排版应该有非常轻微的机械不规则性,就像在旧的野外笔记本上打字或打印一样。 保持安静,并将其置于照片的次要位置。 正确拼写位置和所有单词。 请勿添加口号、品牌、旅游短语、装饰性引言或不必要的文字。 整体真实感 完成的图像应该感觉像是一张真实的旅行照片,安装在建筑师个人笔记本页面上的小型手工制作的现场印章旁边。 优先考虑微妙的物理真实性而不是视觉完美。 照片应该仍然是最强烈的视觉元素。 印章应该感觉像是从照片中提取的一小段记忆,而不是第二张插图。 使用克制的对比度、自然的瑕疵、可信的纸张纹理和稍微不完美的印刷。 最终的结果应该让人感觉安静、有触感、记录性、收藏性和真正的手工制作。 避免 明显的分割线, 圆形印章、邮票边框、穿孔、蜡封、贴纸布局、纪念卡设计、通用旅行模板、平滑矢量徽标、抛光数字插图、卡通造型、3D 渲染、塑料纹理、光泽渐变、过度饱和度、HDR 效果、过多文本、装饰杂乱、过于干净的几何形状、完美对齐的墨层、密集的微型建筑或任何更改/重绘原始照片。
 查看原图
原始提示词
Rubber Stamp Travel Field Notes Poster — Natural Realism Version Create a separate “Rubber Stamp Travel Field Notes Poster” for each photo I upload. Output each photo individually. Never create a collage or combine multiple photos. Use a 4:3 landscape composition with a natural visual transition between the original photograph on the left and the aged-paper field-note area on the right. Do not add an obvious dividing line. LEFT — ORIGINAL PHOTOGRAPH The left side should occupy roughly 58% of the frame. Keep the uploaded photograph visually authentic and recognizable. Preserve the original subject, perspective, terrain, architecture, plants, people, spatial relationships, natural light, shadows, textures, and overall atmosphere. Do not redesign or reinterpret the photograph. Only apply a very subtle editorial photo treatment: gentle tonal balancing, restrained color grading, slightly softened highlights, and extremely fine natural film grain. It should still look like a real photograph taken on location rather than an AI-generated image. Natural cropping is allowed if needed to fit the 4:3 layout, but do not stretch, distort, move, replace, or redraw the main subject. Avoid excessive sharpness, HDR effects, artificial clarity, cinematic color grading, or overly perfect details. RIGHT — AGED PAPER FIELD NOTES The right side should occupy roughly 42% of the frame. Use warm off-white, slightly aged paper with a believable physical texture. Include very subtle paper fibers, fine grain, faint handling marks, and a matte surface. Keep large areas completely unprinted. The paper should feel like a real sheet from an architect's travel notebook or field journal, not a designed poster background. Avoid overly strong stains, decorative textures, vintage filters, or artificial grunge. SMALL RUBBER STAMP Study the uploaded photograph and identify only the few visual features that make the location immediately recognizable. Reduce them into a compact, imperfect multi-color rubber stamp impression. Do not reproduce the photograph element by element. Simplify aggressively and retain only the most meaningful visual relationships: - distinctive architecture and silhouette - important roof, tower, dome, arch, or structural shape - mountain or terrain contours - shoreline or road direction - a few recognizable trees or vegetation forms - simplified settlement layers - one or two important foreground shapes when visually relevant Remove crowds, cars, dense windows, repetitive buildings, tiny vegetation, decorative objects, and insignificant background details. The result should look like something a traveler could have actually carved into a small rubber stamp, not a miniature illustration of the entire photograph. Place the stamp in the lower-middle portion of the right paper area, occupying approximately 30–38% of the right section's height. Keep generous blank paper around it. Do not enlarge it into a large illustration. STAMP COLOR & PRINT CHARACTER Extract approximately 2–4 muted spot colors naturally from the original photograph. Possible colors include: - carbon black - deep green - brick or muted red - ochre - slate blue - taupe or earthy brown Do not force these colors if the photograph suggests a different restrained palette. Each color should appear as a separate physical ink layer. Make the print feel genuinely handmade: - slightly uneven pressure - tiny gaps in the ink - dry areas - paper showing through - rough carved edges - irregular line thickness - small contour breaks - granular ink texture - faint ghosting - slight natural color-layer misregistration - subtle edge variation The imperfections should be small and believable, as if the stamp was pressed onto paper by hand. Avoid perfectly aligned digital layers, smooth vector edges, clean gradients, or artificially exaggerated distress. The stamp should look physically printed, not digitally illustrated. FIELD-NOTE TYPOGRAPHY Generate a small amount of text based only on the actual location and imagery in the photograph: Location — English name No. — Number Three short English keywords Gregorian calendar year Place the text below or beside the stamp within the available whitespace. Use a small, understated typewriter or archival field-note style. The typography should have very slight mechanical irregularity, as though typed or printed on an old field notebook. Keep it quiet and secondary to the photograph. Spell the location and all words correctly. Do not add slogans, brands, tourist phrases, decorative quotes, or unnecessary text. OVERALL REALISM The finished image should feel like a real travel photograph mounted beside a small handmade field stamp on an architect's personal notebook page. Prioritize subtle physical realism over visual perfection. The photograph should remain the strongest visual element. The stamp should feel like a small fragment of memory extracted from the photograph rather than a second illustration. Use restrained contrast, natural imperfections, believable paper texture, and slightly imperfect printing. The final result should feel quiet, tactile, documentary, collectible, and genuinely handmade. Avoid Obvious dividing lines, circular seals, postage-stamp borders, perforations, wax seals, sticker layouts, souvenir-card designs, generic travel templates, smooth vector logos, polished digital illustrations, cartoon styling, 3D rendering, plastic textures, glossy gradients, excessive saturation, HDR effects, excessive text, decorative clutter, overly clean geometry, perfectly aligned ink layers, dense miniature architecture, or any alteration/redrawing of the original photograph.
以上为来源页所载提示词,可选中文本复制。本站译文与解读在下方单独列出。
中英对照
本条译文由自动翻译生成,可与原文对照使用。
Rubber Stamp Travel Field Notes Poster — Natural Realism Version Create a separate “Rubber Stamp Travel Field Notes Poster” for each photo I upload. Output each photo individually. Never create a collage or combine multiple photos. Use a 4:3 landscape composition with a natural visual transition between the original photograph on the left and the aged-paper field-note area on the right. Do not add an obvious dividing line. LEFT — ORIGINAL PHOTOGRAPH The left side should occupy roughly 58% of the frame. Keep the uploaded photograph visually authentic and recognizable. Preserve the original subject, perspective, terrain, architecture, plants, people, spatial relationships, natural light, shadows, textures, and overall atmosphere. Do not redesign or reinterpret the photograph. Only apply a very subtle editorial photo treatment: gentle tonal balancing, restrained color grading, slightly softened highlights, and extremely fine natural film grain. It should still look like a real photograph taken on location rather than an AI-generated image. Natural cropping is allowed if needed to fit the 4:3 layout, but do not stretch, distort, move, replace, or redraw the main subject. Avoid excessive sharpness, HDR effects, artificial clarity, cinematic color grading, or overly perfect details. RIGHT — AGED PAPER FIELD NOTES The right side should occupy roughly 42% of the frame. Use warm off-white, slightly aged paper with a believable physical texture. Include very subtle paper fibers, fine grain, faint handling marks, and a matte surface. Keep large areas completely unprinted. The paper should feel like a real sheet from an architect's travel notebook or field journal, not a designed poster background. Avoid overly strong stains, decorative textures, vintage filters, or artificial grunge. SMALL RUBBER STAMP Study the uploaded photograph and identify only the few visual features that make the location immediately recognizable. Reduce them into a compact, imperfect multi-color rubber stamp impression. Do not reproduce the photograph element by element. Simplify aggressively and retain only the most meaningful visual relationships: - distinctive architecture and silhouette - important roof, tower, dome, arch, or structural shape - mountain or terrain contours - shoreline or road direction - a few recognizable trees or vegetation forms - simplified settlement layers - one or two important foreground shapes when visually relevant Remove crowds, cars, dense windows, repetitive buildings, tiny vegetation, decorative objects, and insignificant background details. The result should look like something a traveler could have actually carved into a small rubber stamp, not a miniature illustration of the entire photograph. Place the stamp in the lower-middle portion of the right paper area, occupying approximately 30–38% of the right section's height. Keep generous blank paper around it. Do not enlarge it into a large illustration. STAMP COLOR & PRINT CHARACTER Extract approximately 2–4 muted spot colors naturally from the original photograph. Possible colors include: - carbon black - deep green - brick or muted red - ochre - slate blue - taupe or earthy brown Do not force these colors if the photograph suggests a different restrained palette. Each color should appear as a separate physical ink layer. Make the print feel genuinely handmade: - slightly uneven pressure - tiny gaps in the ink - dry areas - paper showing through - rough carved edges - irregular line thickness - small contour breaks - granular ink texture - faint ghosting - slight natural color-layer misregistration - subtle edge variation The imperfections should be small and believable, as if the stamp was pressed onto paper by hand. Avoid perfectly aligned digital layers, smooth vector edges, clean gradients, or artificially exaggerated distress. The stamp should look physically printed, not digitally illustrated. FIELD-NOTE TYPOGRAPHY Generate a small amount of text based only on the actual location and imagery in the photograph: Location — English name No. — Number Three short English keywords Gregorian calendar year Place the text below or beside the stamp within the available whitespace. Use a small, understated typewriter or archival field-note style. The typography should have very slight mechanical irregularity, as though typed or printed on an old field notebook. Keep it quiet and secondary to the photograph. Spell the location and all words correctly. Do not add slogans, brands, tourist phrases, decorative quotes, or unnecessary text. OVERALL REALISM The finished image should feel like a real travel photograph mounted beside a small handmade field stamp on an architect's personal notebook page. Prioritize subtle physical realism over visual perfection. The photograph should remain the strongest visual element. The stamp should feel like a small fragment of memory extracted from the photograph rather than a second illustration. Use restrained contrast, natural imperfections, believable paper texture, and slightly imperfect printing. The final result should feel quiet, tactile, documentary, collectible, and genuinely handmade. Avoid Obvious dividing lines, circular seals, postage-stamp borders, perforations, wax seals, sticker layouts, souvenir-card designs, generic travel templates, smooth vector logos, polished digital illustrations, cartoon styling, 3D rendering, plastic textures, glossy gradients, excessive saturation, HDR effects, excessive text, decorative clutter, overly clean geometry, perfectly aligned ink layers, dense miniature architecture, or any alteration/redrawing of the original photograph.